Basic coding in audio and video sources
This topic will get you started with coding audio and video sources—refer to More manual coding techniques for more detailed information.
What do you want to do?
- Understand what you can code
- Code media content at a node
- Code transcript content at a node
- See what you have coded
- Open a node to see the audio or video references
Understand what you can code
In audio and video sources you can code:
-
A section of the media via the timeline
-
Text in the Transcript field (column) of a transcript (if you have one)

Code media content at a node
-
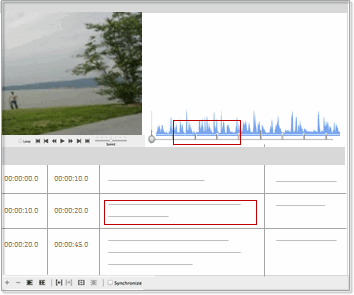
On the timeline, click and drag to select the timespan that you want to code.
NOTE You can hide the waveform to make selection on the timeline easier—open the shortcut menu associated with the waveform area in Detail View, and then click Show Waveform. For information about accessing shortcut menus, refer to Introducing the work area.
-
On the Analyze tab, in the Coding group, under Code Selection At, click one of the following:
-
New Node—to code the content at a new node. Enter a name for the new node, and then click Done.
-
Existing Nodes—to code the content at previously created nodes. Select the nodes and then click Done.

NOTE
-
When coding to a new node, you can create the new node in a specific nodes folder or underneath another node in a hierarchy—click the Location disclosure triangle and choose a new location.
-
Refer to More manual coding techniques for more detailed information about coding.
Code transcript content at a node
-
Make sure you are in read-only mode—refer to Work in edit mode (Understand read-only and edit modes).
-
In a row in the Transcript column, select the text that you want to code. To select a row, click in the row and then press RETURN.
-
On the Analyze tab, in the Coding group, under Code Selection At, click one of the following:
-
New Node—to code the content at a new node. Enter a name for the new node, and then click Done.
-
Existing Nodes—to code the content at previously created nodes. Select the nodes and then click Done. You can also drag and drop transcript content on existing nodes in List View.

NOTE
-
When coding to a new node, you can create the new node in a specific nodes folder or underneath another node in a hierarchy—click the Location disclosure triangle and choose a new location.
-
You can also drag and drop to code selected transcript content at an existing node.
-
Refer to More manual coding techniques for more detailed information about coding.
See what you have coded
To see what has been coded in your audio or video source:
-
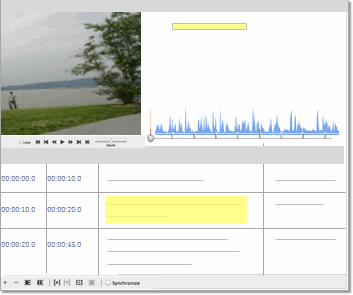
Turn on coding highlight—on the View tab in the Coding group, click Highlight, and then select a highlight option. A yellow bar is displayed above the timeline or in the transcript to indicate coding:

-
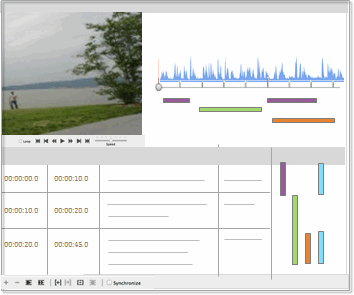
Turn on coding stripes—on the View tab in the Coding group, click Coding Stripes, and then select an option. Coding stripes for the media are displayed below the timeline and coding stripes for the transcript are displayed on the right:

Refer to Highlight coding references and Use coding stripes to explore coding for more information.
Open a node to see the audio or video references
-
Select the node in List View.
-
On the Home tab, in the Item group, click Open.

NOTE
-
You can also open nodes from the coding stripes—right-click on a coding stripe to display the shortcut menu, and then click Open Node.
-
In the Reference pane, you can see the timespan of the audio or video reference. In this release, you are unable to access the coded media content from the node.


